*** Proof of Product ***
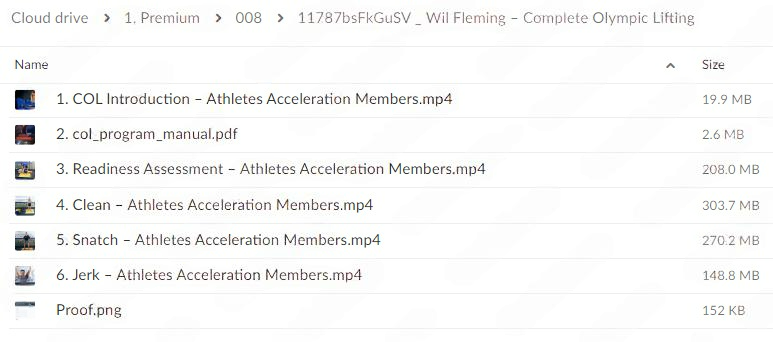
Exploring the Essential Features of “Wil Fleming – Complete Olympic Lifting”
How to Quickly and Easily Progress on the Platform to Develop Power & Explosiveness While Pulling Big Weights in the Olympic Lifts
Discover the Best Ways to Teach, Coach, and Perform the Olympic Lifts with These Exact Training Techniques
Dear Coach,
You know the importance of utilizing the Olympic Lifts (and their variations) as a primary part of your strength training program.
But the effectiveness of any lift is only as strong as the weakest link in that chain of movements.
And there’s a good chance your athletes consistently make mistakes which prevent them from maximizing the time you spend teaching (and reteaching) these movements. At best, they simply won’t get results. At worst, you’ve put them on a path to serious injury.
You know which common errors I’m talking about. The ones you see, but pretend not to see because you’re overwhelmed by so many athletes making so many mistakes… all at the same time.
You know what it should look like. You know what you want it to look like. You’re just not exactly sure how to get them to do it correctly. Your cues aren’t solving the problems. Your toolbox of regressions and partial movements aren’t doing the trick either.
You know they shouldn’t be doing the lifts if they can’t do them right. And you keep letting them do it anyway, hoping time will fix the problem.
But, it won’t. In fact, the longer they do it incorrectly, the harder it will be to fix.
The bottom line is this:
When you have better progressions, regressions and cues for teaching the Olympic Lifts, then your athletes will get more out of their time in the weight room. And therefore perform better in competition.
You don’t need a degree in Olympic style weight lifting to quickly and correctly teach these movements to your athletes. Instead, the only thing you need is a complete system for taking athletes who are complete newbies on the platform to athletes who are pulling big weights.
And there isn’t a coach more primed for the task of teaching it all to you than Wil Fleming.
Wil is the co-owner of Force Fitness and Performance and Athletic Revolution Bloomington, in Bloomington, IN. Force Fitness just turned 4 years old and is already one of the most successful training facilities in the Midwest with nearly 400 clients, 30 athletes earning Division I scholarships and nearly 75 athletes moving on to compete at the NCAA level in Division I, II, III.
Wil is a sought after speaker on the topics of power development, speed, and strength training for athletes. He has spoken at the IYCA International Summit (2010-12), the Midwest Performance Enhancement Seminar (2011), Building Better Athletes Seminar (2012) and the College of the Canyons Strength and Conditioning Clinic (2012). Wil is already booked to speak in 2013 in Indianapolis as the keynote presenter at the St. Vincent’s Sports Performance Seminar, Jacksonville, FL and Columbus, OH at Enhancing Athletic Performance.
Prior to being a business owner, he was an Olympic Trials participant, an all-American athlete, and the school record holder at Indiana University as a hammer thrower. Wil was a resident athlete at the Olympic Training Center in Colorado Springs for Olympic weightlifting after winning a Jr. National Championship in the same sport.
Needless to say, Wil knows his stuff! And here is his program…
Discover the New Complete Olympic Lifting
Part I: Readiness Assessment
Wil takes you through the movement tests that will quickly show you whether or not your athletes are ready to Olympic Lift. This section will show you:
- 3 ‘must do’ assessment movements and specific corrections for every possible limitation your athletes will experience
- 3 useful methods for teaching the Hip Hinge…or they’ll struggle to RDL correctly
- The best way to teach the loaded squat
- How to use certain plyometrics to prepare for the Olympic Lifts
Part II: The Clean
From the grip and core stabilization through the full hang and power clean progression, Wil simplifies every detail in teaching the most popular of the Olympic Lifts. Here you’ll discover Wil’s full teaching progression for teaching the clean, including dozens of cues, regressions and fixes to common errors, as well as a 3 Step Part/Whole Complex putting it all together:
Hang Clean
- Phase I: Establishing the proper starting position and initiating movement
- Phase II: How to move the bar with speed (and what to do when they struggle to put it together)
- Phase III: Incorporating movement of the arms
- Phase IV: Racking the bar from the high pull position
Power Clean
- 3 Step progression for getting into the starting position
- 2 strategies for lifting the bar from the floor in the power clean (beginners vs advanced)
- Why a 2-Part Power Clean should be used before attempting the single movement
Clean Variations (And WHY You Should Use Them)
- The variation you should use for improving the final hip extension phase. (where most athletes fail to complete the lift)
- The variation you should use for athletes who need greater starting strength (track sprinters & football lineman).
- The variation you should use for developing greater power and strength in the starting position.
- The variation you should use for teaching athletes to absorb forces in a semi-single leg stance. (Absorbing the load in this position is similar to sprinting and is an excellent movement when your training theme is: Speed!)
- The variation you should use for improving power production and familiarizing athletes with greater weights.
- The variation you should use for teaching athletes to get into the low squat position required to receive the bar. (Wil teaches a 3 step progression for this variation.)
Common Errors (Symptoms & Causes)
- How to eliminate landing with the feet in a wide catch position.
- How to eliminate jumping forward to receive the bar.
- How to prevent the hips from rising too quickly (leading to the back being parallel to the ground before initiating the first pull) in the power clean.
- How to prevent the elbows from pointing down in the catch position.
Part III: The Jerk
Wil starts with the basics of the jerk (grip, hand/arm and foot position) and then rolls through his full teaching progression, including:
- Keys for teaching the 2 prerequisite pressing movements which must be stabilized before progressing
- How to use the push press and power jerk to teach explosiveness through the hips (instead of just doing an arm based overhead press…)
- Wil’s favorite ‘footwork drills’ for teaching split jerk preparation
Common Errors (Symptoms & Causes)
- How to prevent athletes from catching the bar with the front knee moving forward
- How to prevent athletes from rotating the rear foot outward and catching with too much weight on the back leg
- How to prevent athletes from receiving the bar too far forward
Part IV: The Snatch
Starting with the easiest way to establish grip width and proper foot position, Wil details his full teaching progression for this underutilized lift, including:
Hang Snatch
- Phase I: Establishing the proper starting position and initiating movement
- Phase II: How to move the bar with speed (and what to do when they struggle to put it together)
- Phase III: Incorporating movement of the arms
- Phase IV: Racking the bar from the high pull position
Power Snatch
- 3 Step progression for getting into the starting position
- 2 strategies for lifting the bar from the floor in the power clean (beginners vs advanced)
- Why a 2-Part Snatch should be used before attempting the full Power Snatch
Snatch Variations (And WHY You Should Use Them)
- The variation you should use to help athletes gain comfort in the final hip extension phase of the second pull (where most athletes fail to complete the lift)
- The variation you should use for athletes who need greater starting strength (track sprinters & football lineman)
- The variation you should use for developing greater power and strength in the starting position. (This drill is unlike anything else athletes can do in the weight room)
- The variation you should use for teaching athletes to absorb forces in a semi-single leg stance. (Absorbing the load in this position is similar to sprinting and is an excellent movement when your training theme is: Speed!)
- The variation you should use for improving power production and familiarizing athletes with greater weights. (This movement can be done from any starting position.)
- The variation you should use for teaching athletes to get into the low squat position required to receive the bar. (Wil teaches a 3 step progression for this variation.)
Free Bonus: Training Manual and Full Sample Programs
In addition to the Complete Olympic Lifting System, you’ll get my bad ass training manual containing over 100 pages of practical information supplementing the video and dropping a ton of knowledge that didn’t get covered on film.
I’ll also hook you up with my Olympic Lifting Warm Up and Six Full Sample Programs written exclusively for Complete Olympic Lifting. They include:
- 6 week beginner program (3 days/week for 6 weeks)
- Combination Olympic Lift Program (4 days/week for 4 weeks)
- General Sport & Athlete Program (4 days/week for 4 weeks)
- Novice Program (3 days/week for 4 weeks)
- Speed & Explosive Power Block (4 days/week for 4 weeks)
You know we only put out quality information here at Athletes Acceleration.
To your success,
Wil Fleming
Patrick Beith
Athletes Acceleration
Please see the full list of alternative group-buy courses available here: https://lunacourse.com/shop/


 Erik Banks - Alternative Risk Transfer
  Greg Loehr - Advanced Option Trading With Broken Wing Butterflies
  Ed Ponsi - Forex Trading
  Toshko Raychev - Profit System + ITF Assistant
  Forexmentor - Recurring Forex Patterns
  Atlas API Training - API 570 Exam Prep Training Course
  Racing Workshop - Complete Online Package
  Trade Like Mike - The TLM Playbook 2022
  Dave Landry - Stock Selection Course
  Sovereign Man Confidential - Renunciation Video
  George Fontanills & Tom Gentile - Optionetics 6 DVD Series Home Study Course (Digital Download)
  Matthew Kratter - Trader University
  Team NFT Money - Ultimate NFT Playbook
  Chris Capre - Advanced Price Action Ongoing Training & Webinars
  The Daily Traders – Exclusive Trading Mentorship Group
  Akil Stokes & Jason Graystone - TierOneTrading - Trading Edge 2019
 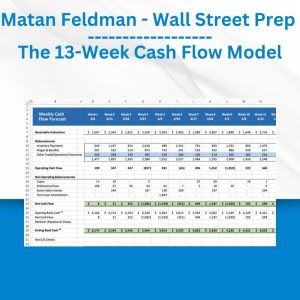 Matan Feldman - The 13-Week Cash Flow Modeling - Wall Street Prep
  SMB - Options Training