

*** Proof of Product ***
Exploring the Essential Features of “Steve Ramsey – Powered Up”
To all weekend woodworkers ready to put their skills to the test…
Today, I Want to Challenge You
…To start building bigger, better,
more impressive-looking pieces by hand.
Are you up to the challenge?
Let’s talk about “the Monday morning question.”
You know, the one that gets asked at the start of every week, just like clockwork:
So, what did you do this weekend?
It’s the moment you rack your brain, and try to remember what you actually did the past 48 hours.
And if you’re like a lot of people, sometimes your answer can be, well, a little bit hazy.
Maybe you did a little yard work, watched a movie, or made a trip to the grocery store… but oftentimes, nothing stands out.
Your “two days of freedom” went by so fast, they felt like a blur.
Sure, you had a lot you wanted to get done, or even planned to do…
But last week was stressful, and you needed to decompress for a couple days… so you “took the weekend off.”
And there you are, with the same old feeling again… that gnawing sense of, “Is this all there is… working hard all week just to spend the weekend preparing to do it all over?”
Listen, I know the feeling.
Once upon a time, I was a graphic designer working the 9-5 office life grind… between my crazy hours, tight deadlines and constant pressure, I was often stressed out.
Luckily, I had an outlet. A place I could go where there were no bosses, no clients, and my time was my own…
My woodworking shop.
And to this day, my little garage shop is still my sanctuary.
Whenever I need a break from the stress of modern life, I can go there and be in my own world.
Walking in to the familiar smell of sawdust immediately puts me at ease.
And the feeling of taking raw lumber, a few tools and supplies, and creating something useful that’s going to last for years… that’s far more satisfying than any movie or TV show could ever be.
But woodworking is so much more than just an escape from the stress of daily life.
Because if you’re willing to push your limits and really “go deep” in this hobby, it can be a chance to build something truly meaningful.
A legacy of beautiful, hand-crafted pieces that will last for decades… that you, your children, and your children’s children will cherish as family heirlooms for years to come.
When you reach that level of woodworking skill, there’s absolutely no feeling like it in the world. It’s gratifying, fulfilling, and gives you a deep sense of pride you simply can’t get anywhere else.
And today, I’m going to show you how you can experience that for yourself, even if you don’t have a lot of time, expensive tools, or a fancy woodworking shop.
Hi, my name is Steve Ramsey.
I’m a passionate woodworker of more than 40 years, and host of the popular Woodworking for Mere Mortals channel on YouTube.
I first started woodworking back in 1978, when I learned to make candle holders on my dad’s lathe.
And since then, I’ve built just about everything you can imagine out of wood.
That’s including home furniture, garden furniture, toys, handicrafts, shop furniture, and even fun little projects like my “impossible” nail through wood trick.
But these days, my greatest joy is teaching others this amazing craft.
Which is why I started Woodworking for Mere Mortals, the original “no frills” channel for woodworkers without big shops or lots of specialized tools.
And in the past 10 years, my channel has gotten bigger and bigger, to the point where it now has over one million subscribers!
And just like my channel has grown, I’ve seen many of my audience members grow right alongside it.
I’ve watched as literally tens of thousands of viewers – many who started out as complete novices – have become confident, capable woodworkers by following along with my projects.
And let me tell you, it’s incredibly rewarding and inspiring to see… I almost feel like a “proud dad” seeing the amazing projects my viewers have made!
And when you have some quality pieces like these to your name, you’ve got an excellent foundation.
But a while ago, I noticed a trend…
More and more students were reaching out, asking me for more advanced projects.
They were saying, “Steve, I love your videos and lessons… but now that I’ve got a few projects under my belt, I’m ready for a new challenge.”
I eventually got so many questions like this, I decided I’d better do something about it.
So I started brainstorming.
What kind of training could I create to really challenge your current skills, while helping you reach the next level of confidence, abilities, and results?
Clearly, the training would need to be practical and hands-on, and not based on theory or doing lots of “practice” projects…
And it would need to incorporate certain specific, more advanced woodworking skills.
Things like elegant and efficient joinery techniques… making highly accurate measurements and cuts… effective project planning… and more.
Because I didn’t want to just challenge you a little bit…
I wanted to help you take your woodworking skills to the next level.
To the point where you’re able to build beautiful, professional-looking pieces by hand in your own shop.
So I started with a long “master list” of 50 potential projects, and began going through it one by one. It took me a while, but eventually I got it narrowed down to just five.
Five projects advanced enough to challenge your skills, but straightforward enough that intermediates and even quick-learning beginners could build them with complete confidence.
With these projects as the foundation, I spent hundreds of hours planning, filming, building, and producing an entirely new program…
An advanced woodworking course for people who are not professionals… the “mere mortals” among us without fancy shops, uber-expensive tools, or lots of free time.
And after months of preparation, I excitedly released the course for the first time in the fall of 2018.
People rushed to the signup page and in the first day alone, hundreds of students eagerly joined the course.
Over the coming weeks over 1,000 new course members worked away in their garages, sheds, or little backyards.
Slowly I started to receive the first photos of their finished projects, and soon it turned into a flood of project submissions and I simply was blown away by what many of them had created.
I thought it was the best instructional material I had ever created, but it wasn’t until I started to see the photos and receive the first feedback from students that I knew I had succeeded.
What past students have said
“I recommend this course to anyone that is not an experienced and professional furniture maker. I have researched virtually all other courses and none can compete with Steve’s course for the woodworking enthusiast, from beginner to accomplished.” – Bob Fincher
“When Powered Up was released I signed up straight away again. The projects are bigger and more advanced, but still within the grasp of the average hobbyist. I would definitely recommend Powered Up to any aspiring or seasoned woodworking hobbyist. Everyone will be able to find something useful in the course content and it will provide you with tons of enjoyment and inspiration to take the hobby further.” – Neil Thistle
“I would absolutely recommend this course. Having limited experience in woodworking, this course allowed me to explore my curiosity about this as a hobby. It has given me hours of enjoyment and relaxation while proving useful projects that people are shocked that I built.” – Roy Radigan
And now after Powered Up has been tested by so many woodworkers, I’m excited to share this special course with you.
Introducing:
Powered Up is my comprehensive video-based program for intermediate-to-advanced woodworkers (and ambitious beginners) ready to take their skills to the next level.
I designed Powered Up to dramatically “shorten the learning curve” so you’re able to build stunning, professional-looking pieces by hand.
To the point where even fellow woodworkers will see your newest piece and say “WOW, you built that?”
And because it’s video-based, Powered Up makes it easy to follow along, right from the comforts of your own shop.
Simply open your laptop, hit play, and watch as I build each project, step by step…
Then you follow along at home, repeating my moves and adding your own flair, one by one… until, surprisingly quickly, you’ve got a big, impressive new piece of furniture hand-built by YOU!
What You’ll Learn…
In Powered Up, you’ll learn important tips and techniques like…
- Why if you want to get really good, you’ll need to ditch the measuring tape (or at least use it a lot less than you do now)
- A method to get faster and more accurate cuts, without even touching your saw
- The #1 mistake people make when finishing a piece (and how you can avoid it)
- Why the gnarliest, weirdest looking lumber often makes the best-looking furniture
- The one thing you never, ever want to do when glueing your pieces… and what to do instead (You’ll wonder “Why didn’t I think of that?” when you see it)
- The “2-cent secret” to making your finishes look extra silky-smooth (this one’s so cheap, it’s nearly free… but it’ll make your finishes look pro-level)
Powered Up Is About Having Fun
If you’re familiar with me and my online videos, you know I’m all about keeping woodworking fun.
So while the projects in Powered Up are challenging, rest assured we’re going to keep things laidback while we build.
After all, this hobby is meant to be enjoyed!
“I would recommend the course to anyone! It’s a great resource for learning advanced woodworking techniques and building impressive furniture. Anyone who wants a really great hobby should take the course.” – Larry Shannon
Course Projects
Powered Up contains 5 comprehensive, video-based projects.
The shelves are deep enough to hold handheld power tools, but still shallow enough so you’ll never lose items in the back.
The cabinet also has four handy pull-out drawers, perfect for storing your nails, screws, chisels, and jigsaw blades…
And the pegboards inside the cabinet doors make a great place to hang your hand tools.
And if there are other features you want, this cabinet was built to be customized!
You can pick and choose the features you want from the project plans, or get creative and explore your own ideas.
The “Get-Organized” Shop Storage Cabinet
“Get Organized” Shop Cabinet Features:
- Big, sturdy, and durable
- Shelves for your handheld power tools
- 4 handy pull-out drawers for smaller items
- Pegboards for storing hanging tools
- Will be a focal point in your shop
And when you start building the Shop Cabinet, you’re going to learn…
How to make accurate cuts with a digital angle finder
If you have an older table saw like I do, the readings may not always be accurate… and over time they can get kind of loose and a little out of whack.
The solution is to use a digital angle finder.
There’s nothing wrong with just using a framing square of course, but I think you’ll find using a digital angle finder is faster, more accurate, and more fun!
I’ll show you how to get the most out of this indispensable shop tool.
Make plywood look like expensive lumber
When building with plywood, one potential drawback is the exposed edges… but I’ll show you an easy way to make them look identical to solid lumber.
An “ancient” finish to make your cabinet look amazing
A couple hundred years ago, natural oil finishes were all woodworkers had.
And back then, you had to boil some of them yourself, not to mention spend days or even weeks rubbing them onto your furniture piece!
I’ll show you a finish that’s easy to apply, quick to dry, and mimics the beautiful, long-lasting shine of those old finishes.
How to hang heavy furniture the right way
One of the best ways to hang anything heavy is to use a “French cleat.”
I’ll show you how to install your French cleat so it’s extra sturdy, level, and makes hanging your new Shop Cabinet a snap.
And coming up in week 2, you’ll build…
The Santa Cruz Pine Bed
Ready for a big, multi-day project to challenge your skills?
Then you’re going to love the Santa Cruz Pine Bed.
With the Santa Cruz Bed, you’ll build an incredibly sturdy, beautiful piece of furniture that’s going to last for generations.
And this bed is completely customizable…
You’ll get plans for all the most common US and metric dimensions… so whether you’ve got a king-size, queen, full, or any other common mattress size, I’ve got you covered.
And that goes for finishes, too…
On the project bed, I use a hand-rubbed lacquer finish for a satin sheen, but you can choose whatever finish you like.
So if a red or purple bed is something that you always wanted, go for it!
Oh, and the Santa Cruz Pine Bed doesn’t have to be made from pine…
(Personally, I love pine… all the knots and loose grain patterns remind me it was once a real, living thing. Plus, it’s affordable!)
But your finished piece will be beautiful no matter which lumber you pick, so if want your Santa Cruz Bed to be made from ash, cherry, or hard maple, the choice is yours!
And if you’re not in need of a new bed, this project is still going to teach you a number of great woodworking techniques… and of course, you always have the option to sell the finished Santa Cruz Bed for a handsome profit once you build it!
Santa Cruz Pine Bed Features
- Beautiful bed that will last generations
- Headboard with cubby holes and fun LED lights (optional)
- Dimensions for all common mattress sizes
- Customizable plans
- Modular design: assemble the components in the bedroom
- A big, challenging project that’s going to test your skills
While building the Santa Cruz Bed, you’re going to learn things like:
Working with longer boards
When ripping longer boards, the right technique is crucial… I’ll show you where to maintain focus so your cuts are smooth, accurate, and most importantly, safe.
Bonus: I’ll teach you a simple way to stabilize the board when drilling into lumber.
Why stain is NOT a substitute for finish… and how to apply both of them the right way
Key point: Stain is only for coloring… which means it doesn’t provide any protection to wood at all.
So if you want your furniture to look beautiful and last a long time, you need a top coat.
I’ll show you how to apply both stain and finish the right way, then I’ll show you a great little trick I use for buffing it to a silky sheen.
Using a miter gauge & rip fence together
There are times you’ll want to use your miter gauge and rip fence together, but you must know how to do it safely. I’ll show you what to do and most importantly, when NOT to use this technique.
A simple “trick” using clamps that saves time and money
Ever needed an extra-long clamp while building a piece, but didn’t have one handy?
Then in week 3, we have…
The Benchtop Router Table
With this little trick, you won’t need one – I’ll show you how to use the small clamps you do have to get the job done just as effectively.
If you’re serious about woodworking, a router is an essential tool to have in your shop…
They’re perfect for cutting rabbets and dados, rounding edges, trimming boards flush, and more.
But here’s a pro-tip: If you’re using your router by hand only, you’re likely not getting the results you could be…
Which is why the Benchtop Router Table was by far the #1 most requested project in Powered Up.
This router table is specially designed for durability, performance, and ease of use.
It has an easy-to-adjust fence that locks in place with shop-made clamps…
While the doors give you easy access to your router, and keep sawdust contained for easy cleanup with your shop vac (which can be attached via the fence dust port).
And to make sure your router bits are always easy to find, I included a handy bit drawer to keep them organized.
Since safety is always consideration #1 when using power tools, I also included a paddle safety switch so you can power off your router quickly and easily, without having to search around.
Now that I have the Router Table, I use it about 100 times more than my handheld router… it’s just that much more practical and effective!
Then in week 3, we have…
The Benchtop Router Table
The Benchtop Router Table with bit drawer
Router Table Features
- Easy-to-adjust locking fence
- Bit drawer with pegboard organizer
- Oversized on/off paddle switch (that doesn’t need wiring)
- Doors and dust port to contain sawdust
- Makes using your router easier, and your cuts more accurate
And as you build the Router Table, you’re going to learn…
How to make super-accurate cuts on plywood
This 4-step process is the easiest way I know of to make precise, straight-as-an-arrow cuts… use it, and you’ll never waste another board trying to “freehand” your plywood cuts again!
An easy way to get pancake-flat melamine board, totally free
As a weekend woodworker, I’m all about saving money where I can… and nothing makes me happier than scoring free tools and materials.
I’ll share a way to do just that, so you can get premium, perfectly-flat melamine board, 100% free of charge.
The art of countersinking
Besides making them look professional, countersinking can make your pieces perform better, too…
I’ll show you my own technique for fast, accurate countersinking that yields a sleek and attractive piece.
Avoiding “blowout” with laminated board
Materials like melamine and MDF are great to build with, but they also have a tendency to “blow out” and chip when drilled into.
I’ll show you a simple technique to avoid blowout by doing the opposite of what you ‘think’ you should do.
Note: As part of the the Router Table module, you also get plans for a simplified version of the project. So if you don’t have a lot of time and want your Router Table built quickly, you can make this “bare-bones” version in a single day.
And the Shop Cabinet, Santa Cruz Pine Bed, and Router Table are just the first 3 projects…
In week 4, you’ll get access to…
The Casual Everyday Office (CEO) Desk
You’re going to love building this big, multi-day piece.
I designed the CEO Desk to be the heart and soul of your home study – a stately piece that’s perfect whether you want to get some work done, or just kick back and surf the net.
The desktop and drawer fronts are cherry plywood with solid oak trim… and I included a thin walnut inlay around the top, for an added touch of elegance.
The deep drawers use full-extension slides to give you easy access to your items.
And to keep the desk lighter and reduce costs, I made the desktop using a “torsion box” method… which means your desk will be flatter and you’ll save money by using less expensive (but just as strong) lumber for the “bones” of the desk.
CEO Desk Features
- Functional, impressive-looking piece that will last for decades
- Fully-customizable design
- Sturdy, lightweight torsion box top
- Deep drawers with full-extension guides
- Modular construction: Complete assembly in your office
While building the CEO Desk, you’ll learn…
Why mineral spirits are your best friend when prepping new lumber
The one thing you must avoid when using screws on hardwood.
A weird “feature” of cherry wood to make your piece look stunning
How to drill pocket holes with complete accuracy and zero slips
Why dirt-cheap “furring strips” are worth their weight in gold
Then in week 5, you’ll get…
The Napa Valley Dining Table
You might say that I’ve “saved the best for last” with the Napa Valley Dining Table.
Because this is a true showstopper piece… a big, beautiful farmhouse-style table with a number of modern touches.
True to style, the top is made from large parallel boards… but I’ve added a pair of breadboard ends for a distinctive look, and to keep the top tight and pancake-flat.
And I’ve gotten creative with the legs too… instead of going with traditional style, I’ve added tapered legs for a modern flair (which means you’ll learn to build a custom tablesaw jig to make the tapered cuts… another great skill to add to your woodworking arsenal).
And finally, I’ll use a super high-gloss finish to give the tabletop a deep, rich shine. After all, I consider this project the crowning achievement of Powered Up, and want it to become a centerpiece in your home.
Then in week 5, you’ll get…
The Napa Valley Dining Table
The Napa Valley Dining Table
Napa Valley Dining Table Features
- Modern update to a timeless style
- Stunning high-gloss finish
- Beautiful, functional breadboard ends
- Made from 100% solid lumber
- Impressive-looking piece that’s surprisingly easy to build!
As you build the Napa Valley Dining Table, you’ll learn…
The special “niche” tool that aligns boards with exacting precision, and how to use it like a pro.
Why lumber is just like a balloon… and how this affects EVERY project you’ll ever make (especially bigger, more complex builds).
How to make sure you always pick the best, most beautiful cuts of lumber for your piece (a simple technique).
Why a featherboard is a must when using your table saw – and how you can easily make your own with minimal tools and supplies.
How to give your pieces a showstopper finish using “grain filler.” I’ll show you how to mix your filler the right way, and a special application technique so it looks amazing.
Throughout Powered Up, you’ll have an “over the shoulder view” as I walk you through each project, teaching you advanced, pro-level woodworking skills in the process.
When you join Powered Up today, you’ll get lifetime access to:
- All five woodworking projects, with step-by-step video walkthroughs and detailed project plans (made in SketchUp)
- Detailed PDF overviews of the five projects – the overviews spell out the steps of each project so you don’t have to take notes or constantly pause while watching the videos
- Complete tools and materials lists for every project… showing you everything you need from tools, to lumber, to safety equipment and accessories
As you can see, I’ve packed my new program with enough content and big, multi-day projects to teach you lots of great new techniques and accelerate your woodworking abilities…
Not to mention, help give you a houseful of new furniture or some beautiful handcrafted gifts for friends and family.
What’s more, when you join Powered Up, you’ll also get access to 3 special bonuses… exclusive extras I created to make the course even more valuable for you.
They include…
Three Special Bonuses
Bonus #1: Picture Frame Fundamentals
Picture Frame Fundamentals
Once you go through this project, you’ll never need to overspend on pricey custom-made frames again.
So forget about buying from the store… in the Picture Frame Fundamentals bonus, you’ll learn how to build beautiful, handmade frames from the comfort of your own shop.
I show you how to select the right wood for your frame, build a tablesaw jig (for making splines to strengthen the miters), how to cut acrylic, how to cut decorative edges with your router table, and much more.
Woodworking is a lot of fun, and incredibly satisfying… but knowing you’re saving big bucks when you DIY makes it even sweeter.
Bonus #2: Handy Guide to Wood Finishes
To make your projects look truly stunning, having a beautiful finish is key.
So I put together the Handy Guide to Wood Finishes, a printable chart to help you know exactly which finishes to use, and when.
Building a picture frame? Refer to the guide to know which finishes will look amazing, and why they’re the best option. Or if you’re building a table, it shows you which finishes will stand up to years of everyday use and still look great.
An Unmatched Opportunity For Any Ambitious Woodworker
As you can see, I’ve tried to go above and beyond with Powered Up, and give you everything you need to level up your woodworking skills…
So you can start building bigger, better, more impressive pieces, right out of the gate.
If I separated out all the projects, bonuses, and extras into their own mini-modules, the amount of premium content could easily sell for upwards of $2,000.
And many woodworking courses actually charge that much:
Many woodworking courses out there expect a huge investment
But I want everyone to have the opportunity to become great at this craft…
So I’m not selling Powered Up for $2,000… or anywhere close.
And I’m not selling it for $1,000, or even $500, either.
Because you’re serious about woodworking and took the time to come here today, I want to do something special:
I’m thrilled to offer you lifetime access to the Powered Up course and all bonuses, including:
- 5 core projects with step-by-step video walkthroughs
- Printable, downloadable plans for each project
- Complete “what you need” tools & supplies lists for each project
- Beginner and advanced modifications
- Bonus #1: Picture Frame Fundamentals
- Bonus #2: Handy Guide to Wood Finishes
Still Undecided?
You’re ready to start building bigger, more impressive projects with Powered Up if…
You’ve already got a handful of great projects under your belt, and want to make sure you absolutely nail the techniques required to get to the next level
You’ve been building things off and on for a while, but aren’t happy with your progress… and the projects you make still feel like “practice pieces” rather than the work of a skilled woodworker
You’re already a confident woodworker and simply want to build some great new furniture pieces for your home, study, and shop
You have no problem dedicating a few weekends to building… as long as you know that every bit of energy you invest is a meaningful step toward woodworking mastery
So, if you can say yes to any of the above then I’d say you’re ready to start building bigger, more professional-looking pieces. And in no time you’ll get to enjoy the surprise on your significant other’s face, the pride your family members feel, and the disbelief other woodworkers experience as they wonder, how did you get so good?
Finding meaning in your shop
Woodworking is one of the most rewarding and gratifying pastimes you can have… especially when you’re building big, professional-looking pieces like you’ll create with Powered Up.
Imagine the feeling of standing in your shop, looking down at your first big, challenging completed project…
Feeling that deep sense of pride and satisfaction only woodworkers can experience… anticipating the moment your significant other sees the “finished product” and their eyes go wide in amazement…
And knowing your family and friends will start to see you in a whole new light: a skilled craftsman with the magical ability to create something beautiful, practical, and long-lasting using only your two hands.
From one woodworker to another, trust me… there’s no feeling like it in the world.
And if you want you to experience that for yourself… join me in Powered Up, and get ready to start building your own “legacy pieces” today.
Please see the full list of alternative group-buy courses available here: https://lunacourse.com/shop/


 Gallbladder Essentials Course - Eric Berg
  Toshko Raychev - Profit System + ITF Assistant
  Forexmentor - Recurring Forex Patterns
  Visionary Leadership Skills - Robert Dilts
  Dave Landry - Stock Selection Course
  Matthew Kratter - Trader University
  Alphashark - The AlphaShark SV-Scalper
  Matan Feldman - The 13-Week Cash Flow Modeling - Wall Street Prep
  Chris Capre - Advanced Price Action Ongoing Training & Webinars
  Greg Loehr - Advanced Option Trading With Broken Wing Butterflies
  Quantum Chart Mastery Course
  Jesse Livermore Trading System - Joe Marwood
  Trade Like Mike - The TLM Playbook 2022
  Self Confidence Generator - George Hutton
  Vic Noble, Kelvin Thornley - Tactical FX Trend Trading Strategies
  Ed Ponsi - Forex Trading
  Julie Stoian & Cathy Olson - Launch Gorgeous - Funnel Gorgeous Bundle
  Fred Haug - Virtual Wholesaling Simplified
 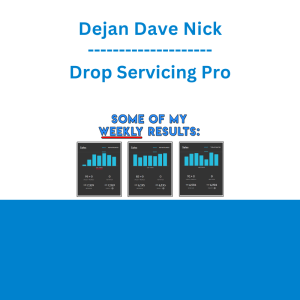 Dejan Dave Nick - Drop Servicing Pro
  Marisa Peer - Freedom From Drugs
  Jason Buckles & Victor Yalom - Diagnosing Depressive, Bipolar, and Alcohol Use Disorders
  Ramit Sethi – 50 Proven Email Scripts
  Sovereign Man Confidential - Renunciation Video
  Tom Torero - What To Do On A Date (A-Z Guide)
  Jennifer Angier - MEADOWS: Awakening on Purpose
  Cathy Lockett - The Heart in Detail
  Cancer Care & Classical Chinese Medicine - Jeffrey Yuen
  Akil Stokes & Jason Graystone - TierOneTrading - Trading Edge 2019
  Joseph Monahan, John Whitcomb, Joseph Willuweit & Monique Patton - Illinois Mental Health & The Law - PESI
  Lovingyou DeluxeBundle Books
  Emanuele Bonanni - My Trading Way
  Phoebe Kuhn - Messaging Program - The Content Emporium
  Crypto Dan - The Crypto Investing Blueprint To Financial Freedom By 2025
  Joshua Winn - Introduction to Astrophysics
  Gerald O'Donnell - The Complete Remote Viewing System
  AJ Wilcox - Advanced LinkedIn Ads
  Angel - Life Mapping A Vision of Success
  David Vallieres & Tim Warren - Expert Option Trading
  Chris Anderson - 60 Years of Challenge vs Bobby Rio Test Deflector
  Linuxacademy - AWS Certified Security-Specialty Certification
  Dave & Sanu - TMB Revenue
  George Fontanills & Tom Gentile - Optionetics Wealth Without Worry Course
  Subliminal Club - Power Can Corrupt: Build Your Social Influence and Power, Avoid Being Manipulated
  Oliver Velez - Essential Strategy Of Trade For Life
  Ultimate ChatGPT Sales Prompt Pack
  Meeyeon Park - Portfolio Management Fundamentals - CFI Education
  Lindsay Adler - Lighting & Posing Large Groups
  Chase Reiner - Authority Hacking
  Laravel – Build a File Marketplace
  Atlas API Training - API 570 Exam Prep Training Course